Thursday, October 01, 2009

Coming Soon
A New Tutorial
Polymer Clay Pendants with Leaf Imprints and Silver Frames


I am working on a new tutorial, which is going to be rather unusual in its format.

One part will explain how to make polymer clay pendants with positive and negative leaf impressions. This is not a new technique, and many people are probably already familiar with it, that is why I decided to separate it from the rest of the tutorial. I want to give people an option of buying the tutorial with and without this part. This part of the tutorial will stand on its own and explain how to make a finished pendant, although without a frame (in case somebody is interested in this technique only).

The second part, however, is rather innovative, because it will explain how to use readily available commercial supplies to make your own flat and custom-shaped frames for polymer clay pendants. I am including instructions for making at least three different shapes of frames, although the possibilities are really endless. I will show how to make smooth and two types of textured frames, as well as how to create a patina finish on these frames. This part will NOT explain how to attach the fames to the pendants - only how to make the frames.  All these techniques can be applied to frame any kind of flat polymer clay pendants (with any design), that is why this second part will also be self-sufficient and may be purchased separately from the first one.

I will also have a more detailed tutorial, with a complete set of instructions for making the pendants shown above.

I am planning to finish the tutorial within about a week. Once finished, it will be available through my web site and my Etsy shop.

Edited on 10/09/09: The main tutorial and its versions will be available today. I decided that the polymer-clay only version (with the explanations of the leaf-impressions techniques) will not be as desirable as an abbreviated version that would explain how to make the frames and how to attach them to the polymer clay pendants. I am in the process of listing all three versions (one full and two shorter ones) on my web site and in my Etsy shop.

The pre-order option is now removed. If you would like to take advantage of this option in the future, please sign up for my newsletter (see the form on the right side of this blog).

Thursday, September 17, 2009

Polymer Clay Exhibition in Baltimore, MD


Baltimore Clayworks is hosting a jewelry exhibition entitled Adornment Adored from October 3rd to November 6th.

Baltimore Clayworks is a ceramic arts organization, which strives to showcase the best to educate and intrigue the public. This new exhibition will showcase the work done with polymer clay, PMC and ceramic components.

The exhibition is intended as a cash-and-carry show, so the customers will be able to purchase the works they like.

I am thrilled to be chosen as one of the participating artists. You may find more information about the exhibition, as well as the complete list of the participants, on Baltimore Clayworks web site.

Wednesday, September 09, 2009

What Is on My Desk
My Son's Science Project

With my love for polymer clay, I think it is quite expectable that my kids very often use this material in their projects. Here is the latest example: my son's science project. Last spring, shortly before they had to start planning their project, I showed him the works of Bird Artist, which he really liked. So, I was not surprised when he asked if he could use some polymer clay to make humming bird feeders for his study.

We have lots of humming birds in our backyard, and usually feed them using a regular store-bought feeder with four red plastic flowers. My son decided to find which color is the most attractive for these birds. He made five feeders: yellow, white, red, blue, and black. I thought it would have been better to vary the intensity of one color, and make white, red, and a three or four pink feeders with different proportions of white and red clay. This way, he could use graphs to present his results. However, he and his teacher decided to go with various colors, so that's what we have now.


First, we made just one test feeder. We replaced our regular one with it to see if the birds would use the new feeder. It looked as if they did not even notice any change.

This weekend, my son made the rest of the feeders, and we placed them around our gazebo. The gazebo has eight sides, and on five of them we placed the feeders. Every day, my son is going to put an exact and equal amount of syrup into each feeder, and then record the amount left in each of them at the end of the day.


Since there is a chance that some feeder locations are more convenient for the humming birds than the others, he is going to vary the position of each feeder every day. Thus, a yellow feeder, for example, will be placed in the first opening of the gazebo on day 1, in the second on day 2, and so forth, until it's been moved through all positions at least a few times. My son wants to run this experiment for a month, but we are afraid that the birds may migrate before the time is over.


It will be interesting to see what he finds out, but I am pretty sure that humming birds do not care what color is behind the hole with their syrup. Once, when we were cleaning and refilling our regular feeder, a humming bird flew to the empty feeder spot (right in front of our kitchen window). She looked quite puzzled by the absence of her food, and tried to get her syrup by sticking her beak first through the feeder hook, and then through these little vent holes we have under the roof. It was very funny! Clearly, neither the hook, nor the vent holes were the color of the feeder, and they definitely did not look like any flowers...

Thursday, September 03, 2009


The Price We Pay


A new anvil - $20.
A hammer - $6.
Some scrap wire – $0.10.
Time spent with my teenager – priceless.


I am writing a new polymer clay tutorial with a wire-working part, so I bought a new and shiny anvil to make some nice-looking pictures. As soon as I take the anvil out of its box, my son comes to the studio. The anvil grabs his attention right away. “O! May I try it?”- he asks, excited. “Sure, honey!”. He grabs the anvil along with a hammer and some scrap wire, and settles on the floor. I almost say something like: “Work gently!” or “Be careful!”, but then remember his continuous fight for independence ever since the school started on Monday, and bite my tongue.

It took him less then two minutes to cover the WHOLE surface of the anvil with nicks and scratches...

Well, hopefully he learned something when I did not yell at him. Or maybe not...

Yet another day of parenthood...

On a positive side: It does not look nearly as bad in the picture as it is in person. I think I can still use it in my tutorial (with a little creative photo-editing, perhaps).

Tuesday, September 01, 2009


New Buttons


I just added these two sets of my new hand-made polymer clay buttons to my Etsy shop.

They are square, with an interesting abstract design in earth tones. I did not use any paints or sealants on them and added some nice texture on their front sides.

I think these buttons would look great on some knitted or crocheted things.

Friday, August 28, 2009


One More Etsy Treasury

Tonja of tonjastreasures.etsy.com created this lovely treasury:


etsy.com/treasury_list_west.php?room_id=66243


Thank you for including my bracelet!

Thursday, August 27, 2009

Turtle-quoise Treasury


My green and turquoise earrings were included in a cute polymer clay treasury by Linda Riopel of NKDesigns.etsy.com:


etsy.com/treasury_list_west.php?room_id=66088


Linda explained her collection by this cute story:

Talking to my 4-year-old granddaughter, I asked her if she knew what color her beautiful dress was - “Of course I do gramma, it's turtle-quoise.”

Saturday, August 22, 2009

...And More Student Work!

I've got another picture from Donna (I wrote about her work earlier this month).

This time, Donna followed my Steampunk Butterfly Tutorial, and this is the pendant she made. She says, the she showed this pendant on her www.mosaicandstainedglass.org mosaic site, facebook, and flickr, and was very pleasantly surprised by the amount of comments that she received. Donna was kind enough to provide a link to my tutorial, and I really appreciate it.


On a side note: my kids are back after spending two months with their grandparents, and while I missed them a lot, I have to admit that now the amount of my free time dropped down catastrophically...

Sunday, August 16, 2009


Another Green Treasury

My Steampunk Butterfly Tutorial is in a another green treasury by Carrie & Kathy of Ametista.etsy.com:

http://www.etsy.com/treasury_list.php?room_id=76271

I love green!

Thank you, Linda!

Friday, August 14, 2009


My Necklace in Fire Mountain Catalog

My orchid lariat necklace was published in the new FMG catalog. It took the third place in the polymer clay category of their beading contest - 2009 (although physically the work submission and all judging was done last year) .

The necklace features three hand-sculpted polymer clay orchids on one side of the lariat balanced off with a half of a dozen sculpted leaves on the other side. There are six strings of seed beads and Swarovski pearls in various sizes that hold the orchids in place and split on the other end of the lariat in a tassel-like fashion. This design could have been executed in other colors, but for some reason I wanted it in gray (or silver and steel if you prefer). I think in person it looks great this way, although for a beading catalog pictures I am sure a brighter version would have been better.

Earlier this year, when this design was appeared on FMG web site, I was commissioned for a bridal version of this necklace (all white, with white pearls mica powders on the flowers and interference green on the leaves).

Thursday, August 13, 2009

Treasury: Green


My orchid pendant is included in a beautiful treasury by Linda Riopel (NKDesigns.Etsy.com):

www.etsy.com/treasury_list.php?room_id=76079

Linda featured polymer clay works by the members of Etsy PCAGOE team. What a great showcase of polymer clay diversity!

Thank you, Linda!

Wednesday, August 12, 2009

Another Student Work

Zuleykha, who bought my Faux Cloisonne tutorial, responded to my yesterday's post with a link to a picture of her creation. I decided to post her picture here.

Zuleykha used my technique to make her own design, which is very beautiful and received many compliments both in her photo album and in her blog.

Zuleykha is an anthusiastic polymer clayer, and has a shop on Etsy, Zuleykha.etsy.com, where she sells her pretty beads covered with millefiori cane slices.

Tuesday, August 11, 2009

Student Work

I really, really love it when people, who buy my polymer clay tutorials, later share the pictures of their creations with me.

Last week, I received this picture from Donna, who made this pendant following my Faux Art Glass Tutorial.

I am glad Donna had fun working with this tutorial. She said, she also bought the Steampunk Butterfly Tutorial, but did not have a chance to try it yet. I hope the result will be as beautiful, and she will share it with me as well.

Added: Donna sent me a link to her photo album. She does amazing mosaic!

Monday, August 10, 2009


New Treasury

I've started listing the polymer clay and resin pendants from my new line in my Etsy shop.

I was very pleased to learn that one of the pendants was added to the new treasury by Kathy of RozPetalzStudio.etsy.com.

Here is the link to the trasury:

etsy.com/treasury_list.php?room_id=75210

Thank you, Kathy!

Friday, July 24, 2009

Coming soon to an Etsy shop near you...
I spent more than a month developing and refining two new lines of jewelry, which I will start listing in my Etsy shop in August. I know, doing them one at a time would have been wiser, but inspiration is a powerful force, and I simply could not fight with it. The first line is sprouting from my original faux cloisonne technique. Those familiar with this technique know that a faux cloisonne design is created by pieces of wire, meticulously measured, shaped, and applied to the surface of raw polymer clay. It is a very time-consuming technique, and every piece made like that is truly unique. The new technique I am coming up with still employs the line as the major design element, but it allows me to make multiples of the same design, with or without some variations. While I am not ready to share the details of this technique yet, I am happy to show you a few proof-of-concept pieces:

Since these pendants require less time to make, I will be able to offer them at more affordable prices than my faux cloisonne creations. The second line is all about color. The picture below shows a few of my cabochons ready to be made into pendants and earrings. I will also have them available as beads for those who would like to use them in their own designs. And here are some experiments with fusing these two techniques. While the results are interesting, I am not quite pleased with them yet. I think I will list these pendants in my Etsy shop as well and wait to see what kind of response I can get. I may come back to this concept and explore it some more, but I am not planning to do it right now.

Tuesday, July 21, 2009

A Good Article

Here is a good article I came across about starting your own craft business. I hope you will find it useful!

http://artsandcrafts.about.com/od/startingyourbusiness/tp/startcraftsbusiness.htm

Monday, July 20, 2009

Tutorial<br />Polymer Clay Vase

New Tutorial
Polymer Clay and Pearls Vase


I finished writing this tutorial over weekend and it is now available in my Etsy shop.

Wednesday, July 15, 2009


Cool!


I've just found out that my work is being featured in three different treasuries on Etsy right now:
Happy Go Indigo by AmetrineHealing.etsy.com,
Amber by noblegnome.etsy.com,
and Learn Make Enjoy by Collete.etsy.com.

I can't believe it! This is the first time for me to have my works in three treasuries at the same time. Cool, isn't it?

Thank you, ladies!


Friday, July 10, 2009

polymer clay poppy bead

Red Poppy Focal Beads or Buttons
Polymer Clay and Fiber


I just listed these focal beads in my Etsy shop, Eugena777.etsy.com.

I've been playing with this design for awhile and very pleased with the results.

First of all, I am happy with the combination of polymer clay and fiber. Looks different, isn't it?

The other exciting thing about these beads is that they may be used in so many different ways in various designs. Bracelets, necklaces, rings, earrings – anything! These beads would work as unique buttons as well. Imagine three or four of them in a row on something a hand-knitted or crocheted...

I made these beads with two parallel beading holes, about 1/8” apart. The beads may be used in multi-string designs, and their structure will prevent them from turning over when the finished piece is worn. In a single-string design, one of these beads would also work great used as a focal part. In this case, use only one beading hole. Because the hole is off-center, the bead will be perfectly balanced and stay on its right side when the necklace is worn.

Yet another possibility is to combine them with wire and chains.

polymer clay poppy necklace

Here are a few pictures explaining, step-by-step, how to make this necklace. You will need about 2” of 24ga wire, some jumprings, two red poppy jasper beads on headpins, a clasp, and about 20-21” of chain (the two dangling pieces of chain at the bottom of the necklace are about 2” and 2.5”, and the necklace itself is about 16” long).

red poppy polymer clay bead necklace  step by step

Thursday, July 09, 2009

Always and Forever


My brown Steampunk butterfly necklace was included in the treasury made by Kate of OrganicOdysseys.etsy.com.

This is what Kate said in her comments: "Love transcends space and time. Circles symbolize eternity. Always and Forever has been my all time favorite song for over 35 years. I hope you enjoy this collection!"

Thank you, Kate! It is a lovely collection!

Here is the link to this treasury:

etsy.com/treasury_list.php?room_id=69433

Wednesday, July 08, 2009

Student Work


I absolutely love it when people, who bought my tutorials, share the pictures of their finished creations. I also love to see how my students change the techniques and projects I teach to make them their own.

That is why I was so excited when Arlene Harrison (harrisonhollowdesigns.blogspot.com) sent me the pictures of these bangle style bracelets she made following my newest Polymer Clay and Gemstones Bracelet Tutorial.


Arlene mixed the beads of various sizes and made the bead inclusion multi-string. She also used stamps to add texture to her bracelets and added swirled details. The resulting bracelets look very beautiful and distinctively different from the project in the tutorial, which is great. I am happy to see how Arlene took the ideas presented in the tutorial and used them as a base for her own creativity and imagination.

Way to go, Arlene, and thank you for sharing!


Monday, July 06, 2009

New Bracelets


These bracelets are coming to my Etsy shop this week.

They combine polymer clay and gemstones: Baltic amber, goldstone (which is actually a man-made material, I know), imperial jasper, blue kiwi, and Russian amazonite.

I've been playing with the new photo prompts for these pictures, too. The saucer in the second picture, for example, was found on a garage sale last week. The lady who sold it, kept explaining to me how easy would it be to clean this thing. I said: “Thank you, I am not going to clean it – I want to use it just as it is!” She kept insisting that all I need to do is scrub it with some baking soda...

polymer clay and amber bracelet
polymer clay and goldstone bracelet
polymer clay and imperial jasper bracelet
polymer clay and blue kiwi bracelet
polymer clay and Russian amazonite bracelet

Sunday, July 05, 2009

Another Treasury!


This one is by Barbara handy of BarbiesBest.etsy.com. Barb included all kinds of polymer clay beads and pendants, a raw polymer clay cane, and my tutorial (Thank you, Barbara!). I love the idea behind this treasury!

And here is the link so that you could look at all the featured shops closer:
www.etsy.com/treasury_list.php?room_id=69038

Monday, June 29, 2009

My Work in a New Treasury


Linda Riopel (www.nkdesigns.etsy.com) featured my red orchid bead in her new treasury, Call 911... PCAGOE is on fire.

I really appreciate it, especially since creating a treasury, as well as securing a spot for it on etsy.com, is a very time-consuming process. I also love the titles that Linda comes up with for her treasuries.

Follow this link: http://http://www.etsy.com/treasury_list_west.php?room_id=59164
to see all the beautiful polymer clay works in this treasury and to visit the shops of the featured artists.

Friday, June 26, 2009

tutorial polymer clay  bracelet
New Tutorial, Bracelet


I finished the new tutorial today and quickly listed it in my Etsy shop, just in time before the weekend.

Placing it on my web site will take a bit longer, but I shall have it there no later than Monday.
Happy claying!

Thursday, June 25, 2009

Perfect Gifts
for a Perfect Sister

My big sister turns 50 tomorrow. She lives in Moscow, we see each other very seldom, and I miss her...

My sister was born in Siberian city, Krasnoyarsk. When she was about a year old, our parents moved to Ukraine, and somehow she never visited her place of birth again. She wanted to go there this year, but again some family business kept her away from this trip.

My sister loves to travel. She's been in many places in Europe, in Egypt, Japan, America, and a few times in Australia. From her trips, she always brings back a decorative plate with a view of the place she visited. An entire wall in her kitchen is covered with these plates.

So, since she could not go to Krasnoyarsk, I decided to make her a plate with a view of this city. I shifted through quite a few pictures, but neither one touched my heart. There were a few interesting buildings and bridges, but I had no idea whether they were there 50 years ago or not. Then I remembered about the place near the city called Krasnoyarsk Columns. They are not mountains, but rather huge rocks, partially covered with trees. I found a picture of two of them that look like heads of some fantastic giants and used it to make a photo transfer onto white polymer clay. This is the first time I've ever done anything in this technique, so I am rather proud of myself. I used black and white picture and antiqued the finished plate for a weathered look. I hope my sister will love it. I think she can honestly place it with her other travel souvenirs – her birth certificate proves that she' s actually been to this city.


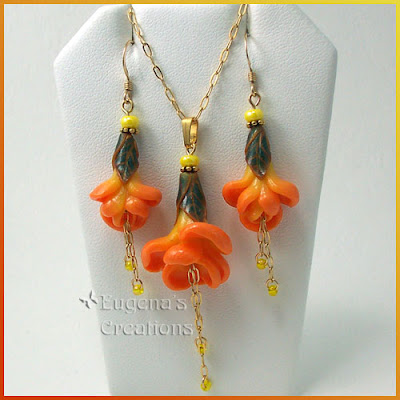
My second gift for her is a set of earrings and a pendant. I remember our mom telling us about some small Siberian flowers, called “zharki”. The root of this word, “zhar”, means “heat” in Russian. She said they were incredibly bright-colored, and the entire tundra looked like it was on fire when they were in bloom. The sculpted flowers for this set is my artistic interpretation of this memory...

Tuesday, June 23, 2009

polymer clay bracelet tutorial Work in Progress,
New Tutorial


I am working on a step-by-step tutorial for this fantastic bangle bracelet.

The design combines polymer clay (of course!) with some gems, and looks wildly exotic.

I hope to have this tutorial in my shop by the end of the month.


My Work is in a New Treasury


Katherine from KatherineJewelry.etsy.com featured my heart pendant form Forgotten Map series in her
new treasury.

All works in these collection are polymer clay hearts. Isn't it amazing how different they are?!

Saturday, June 20, 2009

My Work Is in Etsy Treasury


Linda Riopel of NKDesigns.etsy.com included my sea urchin vase tutorial along with the works of eleven other PCAGOE artists in her new treasury, I Can Sea Clearly Now:
http://www.etsy.com/treasury_list.php?room_id=65922

Thank you, Linda!

Wednesday, June 17, 2009

Etsy Treasury
Craving Chocolate

To be honest, I have mixed feelings about Etsy treasuries – both about making them and getting my works in them. They are quite time consuming, and I seriously doubt their effectiveness as a marketing tool. I realized that my works were featured in a few treasuries recently, and I did not even post about it in my blog, which is not nice and probably not wise either. Now that I have more time I promise to do better.

Think about this treasury as a little collection made for fun and simple pleasure of seeing beautiful works of art. I hope you get the symbolism here, especially if you are a chocogolic, like myself.

Here is the link to this treasury on Etsy: http://http//www.etsy.com/treasury_list.php?room_id=65068.

Leave me a note there if you like it, and please make sure to click on each picture (again, from Etsy web site) to see more works of these talented artists.

Tuesday, June 16, 2009


My Article in Polymer Cafe

I just received my contributor's copies of the August issue of Polymer Cafe magazine. My article, Steampunk Business Card Case, is published!

Click on the picture above for a larger version of it.

Monday, June 15, 2009

One Lovely Blog Award

I received the One Lovely Blog award from Tracey of TKDesigns. I hope you will take a moment to visit Tracey's blog, where she writes about her jewelry designs and her inspiration. I am sure you will enjoy her recent story about a bear visit to her backyard, complete with pictures!

Now it's my turn to pass this award on to some other blogs.

Here are the rules:
*Accept the award, post it on your blog together with the name of the person who has granted the award, and his or her blog link.
*Pass the award to 15 other blogs that you’ve newly discovered.
*Remember to contact the bloggers to let them know they have been chosen for this award.

...And here are my 15 newly-discovered lovely blogs (not in any particular order):

alicestroppel.wordpress.com
lulubugjewelry.blogspot.com
www.njdminiatures.blogspot.com
swoondimples.blogspot.com
deserttalismans.blogspot.com
harrisonhollowdesigns.blogspot.com
campcactus.blogspot.com
humblebeads.blogspot.com
jibbyandjunablog.blogspot.com
beadcomber.blogspot.com
creagerstudios.blogspot.com
sharonsjewelrygarden.blogspot.com
thecolorofdreams.blogspot.com
livingwithwalls.blogspot.com
elementalforrest.blogspot.com

Behind each of these blogs, there is a talented person, whose work I admire. Some of them were recently featured in my Polymer Clay Chameleon blog.

Wednesday, June 10, 2009

Giveaway Results


I would like to thank everybody who commented on my previous post.

Judging by your comments, the bracelet tutorial would be the most interesting and the vase one – the least interesting for most people. I am a bit surprised by this result and very glad I asked for your opinion. Thanks to your comments, I now know how to better concentrate my efforts.

And now the results of this giveaway... I did a random drawing, and the lucky winner is... Dziga! She will receive one of my tutorials at her choice.

Dziga, please contact me by e-mail to claim your prize.

Tuesday, June 02, 2009

Giveaway

I am starting a new giveaway! The prize this time is one of my tutorials (again!), and the winner will be randomly chosen on June, 10. To participate, please answer these questions.

I am currently working on three new tutorials. One will be for a set of polymer clay bracelets (each with its own design). Another tutorial is for tree pendants, all created with a simple and clever hand-made tool, but each with its own design. The last tutorial is for a new vase, similar to this one.


So, which of these tutorials would you be the most interested in? And which you think is the least interesting?

Please post your answers as comments to this post.
Related Posts with Thumbnails